Posts

Maiden Voyage

Image
 It's alive and on the road!  I got all the HV wiring done, tested the precharger, fired up the power steering and power brakes, wired up the ignition key, installed a computer for the gauge dash app, hooked up the CANbus, and took it out for a spin.  Very exciting stuff.

The Transplant is Successful

Image
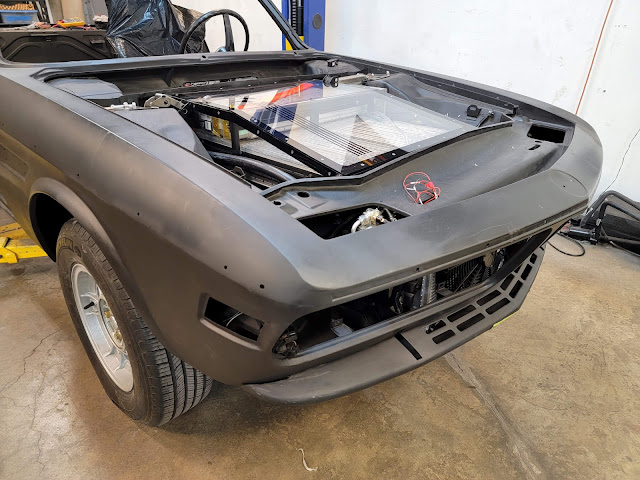
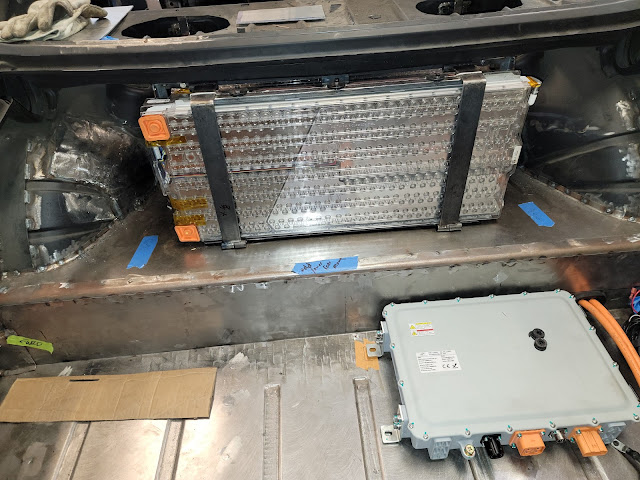
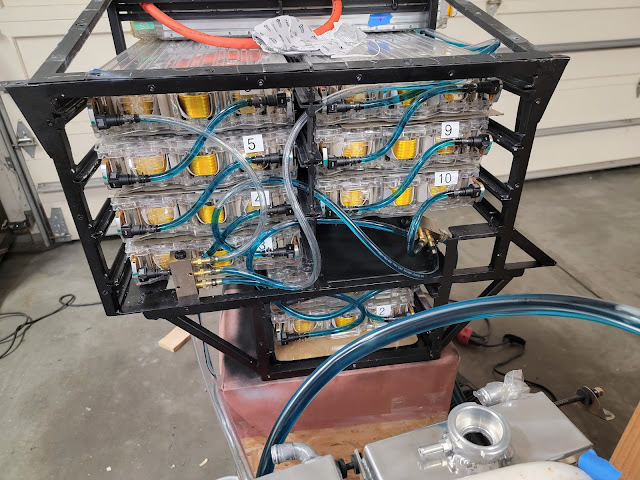
I've successfully transplanted all the components from the donor Tesla Model S into my 1973 BMW 3.0 CS coupe.  The last organs to be inserted were the 10 battery modules up front.  Now, all 14 batteries are in place, the motor, inverter, and differential unit is installed, the iBooster is operational, and even the Tesla electric air conditioning compressor is in place.

Plugged In

Image
The onboard charger and battery management system have been in the car for a while but until today I had no way of adding electricity to the car.  I bought a J1772 receptacle a while back but hadn't got around to fabricating a way to mount it to the car.  

Battery Box Assembly Line

Image
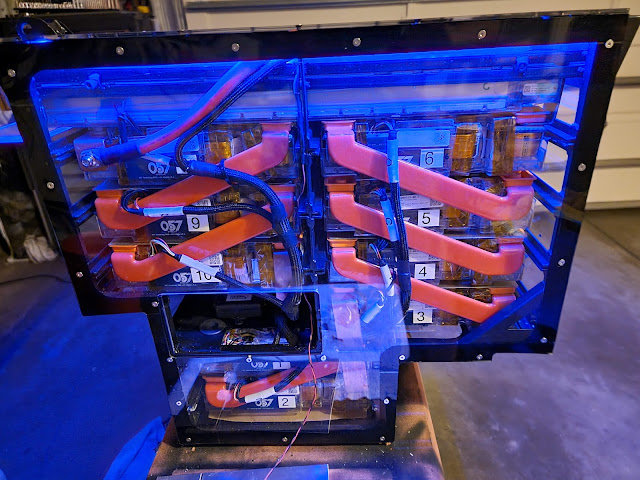
Building a box to hold batteries sounds so simple.  It isn't. The batteries have been in and out of my front box many times now.  The latest reasons for disassembly were to relocate the BMS and plate the buss bars .  While plating, we decided to do the buss bars in Paul's car also since the battery box is out of the car while the car is being painted. My box on the left, Paul's on the right It is interesting to see the two approaches to battery fitment side by side.  Figuring out how to get 14 Tesla Model S battery modules fitted into a car designed for a gas engine and transmission is always the most difficult part of the EV conversion process.  The big rectangular batteries just don't want to fit into the curvy voids of a normal car body.

Moving the Needle

Image
 My first attempt at programming a simulated analog gauge entirely via software was OK but didn't have parity with my digital version and was missing some features such as cruise control, warning icons, and power mode.  So I worked on it some more.

Get on the Buss

Image
The Tesla batteries need to be wired up in series to get to the 350+ volts necessary to operate the Tesla drive unit.  This means connecting them all together, one by one.  This could be done with cables but they'd have to be big cables because the drive unit can draw up to 680 amps under full throttle.  Cables that large are hard to work with so a better alternative is copper buss bars. 

BMS Bubble

Image
 My plan had been to mount the Battery Management System unit in the front battery box, in the void near the steering gearbox.  There is enough room and I had everything mounted when I realized there was a problem.  The Orion BMS 2 wiring manual clearly states:

Back in Black

Image
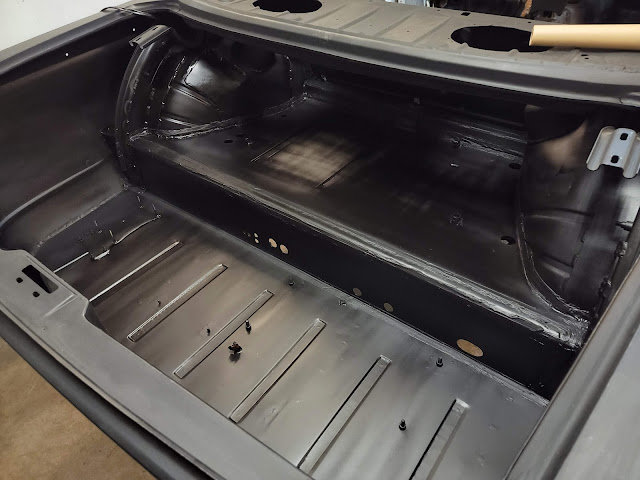
When I had the car media blasted, almost two years ago, I had them shoot black epoxy primer to protect the bare metal from rust.  Since then we've done a lot of cutting, welding, rust repair, fabrication, etc and exposed a lot of steel.  Since I'm getting serious about installing all the wiring and EV components, I figured now would be a good time to re-prime all those exposed areas, before they become difficult to get to. I didn't want to stall the goal of driving the car within the next two weeks so I took a day off work and disassembled the wiring in the trunk area, the cooling pipes, the A/C, power steering, and brake booster so that I could shoot some paint.  This, along with prep and masking took the better part of a day so I ended up shooting the epoxy primer late at night.  At least now everything is protected.

When they go Low, we go High (Voltage)

Image
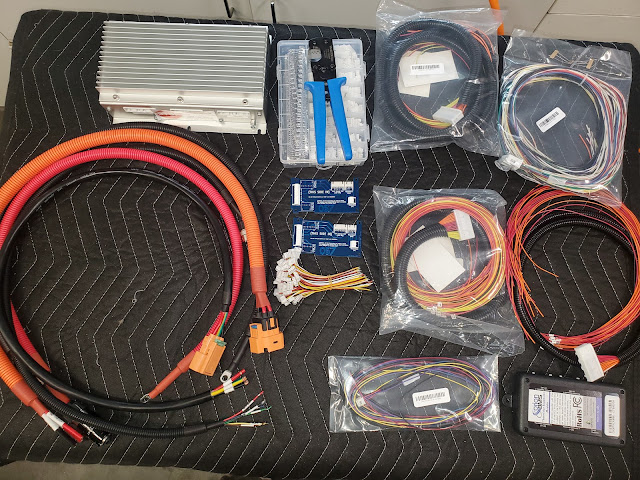
 It is getting close to being on the road again.  Pretty much the only thing left is wiring.  Lots and lots of wiring -- it is an electric car after all.

Batteries in the Front, Batteries in the Rear

Image
With 10 Tesla Model S batteries up front, the job is only 71% done.  Because the Tesla drive unit needs a minimum of 272 volts to operate, and each module has up to 28 volts, there would be basically zero range with 10 fully charged modules.  Therefore, I need to add at least 4 more modules to the car somewhere to get any power or range.

We're hosed

Image
Hoses and brake lines are a challenge on this Frankenstein project.   Brake lines a combination of metric DIN bubble flares and ISO imperial double flares, with a super odd metric double flare on the Tesla master cylinder.  Plus, the original ATW front calipers have two redundant circuits so the original master had 5 ports.  The Tesla iBooster only has two.  And the original rear-mounted proportioning valve isn't practical with this new setup.

Building the "Aquarium"

Image
When we showed Paul's car off at the La Jolla Independent BMW owners gathering in June, 2021 I realized that no one knew what they were looking at.  Electric conversions are still relatively rare and when we popped the hood to show the big aluminum "oven" that holds most of the Tesla batteries people asked questions like "is there a motor in there"?

Danger High Voltage!

Image
Hooking up the first 10 Tesla battery modules for traction (High Voltage), monitoring, charging, and cooling is a big job.  As mentioned in the " We're Monitoring You " post, each set of cells needs to be monitored by the BMS to balance the cells and prevent overcharging.  They also need to be watched for temperature when driving via the built-in thermistors and cooled via the built-in cooling passages. I started with the high-voltage side of things because that dictates where everything sits in the battery box.  There are a number of ways to connect the batteries but I came up with one that terminates both the negative and positive terminals in the "BMS Void" area of the box and can be connected with solid copper busbars in every junction except one.

Keeping Our Cool

Image
Recall from the post on fitting the Tesla batteries, the cells are made of a nickel cobalt manganese aluminum oxide cathode with a graphite silicon anode.  The cathode chemistry of these cells is such that gives off free oxygen at a fairly low thermal temperature of perhaps 180C - very low by lithium battery standards.

Going Analog in a Digital World

Image
You've read about the fancy digital dash app I've written that displays all sorts of information on a display in the hole that used to belong to the tachometer.  But that still leaves four other analog gauges in the instrument panel: The speedometer, clock, fuel, and temperature gauges.  These are old school VDO gauges that just look proper and cool so I want to make them all work with this new digital vehicle.

Suspended upside down

Image
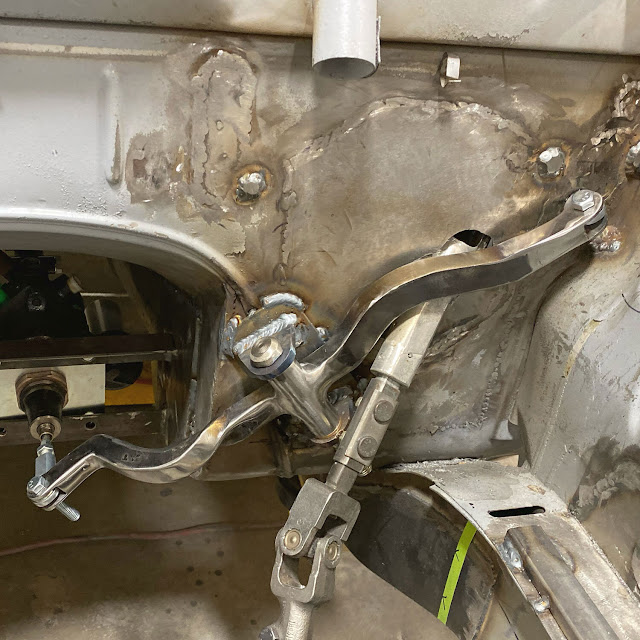
 The rear suspension on a BMW 3.0 CS is supported by a rear crossmember that spans the width of the car, with the trailing arms mounted to clevises and the ends bolted to the car via rubber bushings. As mentioned previously in the Brace up Boys post, the crossmember is normally triangulated by the differential, which is mounted to the floor of the unibody, but I cut the diff mount off of the crossmember since it is in the way of where the Tesla drive unit needs to sit.  I then fabricated a new forward-facing member to triangulate the crossmember securing the the car.  Seemed good.

We're Monitoring You

Image
As mentioned previously, careless treatment of the Tesla battery modules can be catastrophic, leading to fire or other failure.  Therefore, it is important to monitor the state of the cells to assure they are in proper temperature and charge or discharge. To do this, a Battery Management System (BMS) is required.  I'm using the popular Orion BMS 2.  The BMS protects and monitors a battery pack by monitoring several sensors and using several outputs to control charge and discharge into the battery. The BMS measures inputs from cell voltage taps, a hall effect current sensor, and thermistors. Using the programmed settings, the BMS then controls the flow of current into and out of the battery pack by broadcasting charge and discharge current limits via the CANBUS to the OnBoard Charger (OBC).  During and immediately after charging, the BMS will balance the cells using internal shunt resistors based on the programmed settings.

Stop, park, but don't roll

Image
The Tesla drive unit only has Forward, Reverse and Neutral. There is no Parking pawl. On a real Tesla there are electric worm-drive parking brake calipers that clamp down on the rear discs when park is engaged and stay there even when power is cut. Paul adapted those to his car because he was already fabricating new caliper mounts for his Wilwood upgrade but I'm sticking with stock brakes so that wasn't an option for me. Initially I thought I'd just flash a "Pull Hand Brake" type message on the dash app when you engaged Park but I found a better solution with a product called eStopp.

Big data

Image
With the first BMW CSE out in the real world, driven everyday, I'm getting lots of good feedback for improvements to the dash app. Now that I have access to CAN messages from the BMS there's a lot more data to consume/display.

Pedalfest

Image
Bolting in an electric motor and some batteries is the easy part. The devil is in all the little details and decisions that need to be made to retrofit and replace needed systems like braking, power steering, cooling, HVAC, etc. The biggest hurdle yet to overcome is braking. Paul changed to Wilwood all around and devised a very clever mechanical solution (Fred) to change the direction of brake pedal travel and translate it into the transmission tunnel area where he mounted a hydroboost and Wilwood master in a backwards orientation. All that scared me and I had already rebuilt the stock ATE brakes before deciding to go EV so I had hopes of retaining stock braking all around.

Fitting a square display into a round hole

Image
Recall, I'm trying to add a digital dashboard display in the round hole normally filled by the tachometer of the stock BMW instrument cluster.  It is a gorgeous set of VDO instruments set in a French walnut real wood cluster.  I want to keep as much of the original look as possible but there is no need for a tachometer.  The speed of the Tesla motor is many times faster than a gas engine and basically irrelevant.  Instead, I'd like to know what gear I'm in, the state of my batteries, the most critical temperature of the components, my remaining range, output power, etc.

Getting the shaft

Image
The Franken half shafts arrived from the Driveshaft Shop and they look great.  These have Tesla inner CV joints with BMW outer CVs, made to the custom length I measured for my application.  

Shifting gears

Image
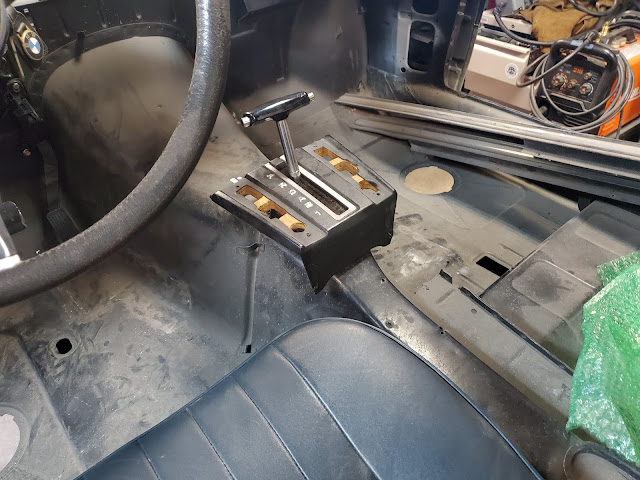
Gear selection in a Tesla drive unit is done electronically.  That's why so many electric cars have gear buttons instead of gear levers -- there's nothing physical that needs to move.  But, in trying to keep the original BMW aesthetic, I want to use the stock automatic transmission shifter to send signals to the Tesla drive unit.  

Batteries, batteries, batteries

Image
The Tesla Model S battery system in my car consists of 14 individual modules (a real model S usually has 16). Each are 27 by 11.5 by 3.5 inches in dimension and weigh 55.8 pounds. They consist of 444 individual 18650 battery cells with 74 cells in each voltage cell and six of these voltage cells in series.

You're suspended!

Image
In order to accurately test battery fitment, I had to mount the front suspension cross member so that I could install the steering gearbox.  The batteries will need to clear that.   I had spent months rebuilding all the brakes and suspension for the car, prior to deciding to go electric.  Fortunately, all those parts should work fine with the EV conversion. 

Brace up boys

Image
As mentioned previously, with the differential mount cut off the rear suspension I needed a new way to properly locate and secure the rear suspension member.  Tyler fabricated a long arm that welds to the front side of the member and travels forward into the old driveshaft tunnel.  Of course, I no longer have a driveshaft so that room is up for grabs now.  Using a motor mount from a Chevrolet Suburban, we welded a mount to the tunnel and bolted the new arm to the body via the rubber mount.  This is solid fore/aft but allows a bit of up/down swing if necessary.

It's Alive!

Image
The theory has been proven.  We drove Paul's coupe for the first time!  While my car is still a ways away from moving under its own power again, we got Paul's on the road, complete with a working prototype of my dash app.  

Coding begins...

Image
I have the motor controller for the Tesla motor and plan to integrate that with a Raspberry Pi micro computer over a CAN bus for instrumentation (not using it for gear selection -- there are 12v inputs on the controller for gear selection so I plan to fab a unit with detents and a delay relay that will integrate with the original BMW automatic shifter but that's a future project). 

Mounting the Motor

Image
Tesla motor, axles, and batteries have arrived. Unlike Paul, who is using the large Tesla motor, I have opted for the small rear drive motor. My goal is 300 hp and 200 miles of range. Not the 450 hp Paul is shooting for. 300 seems like plenty to me, given the stiffness (lack thereof) of our skinny pillared unibodies. Plus, the small motor sheds 100 pounds vs the large motor and is physically smaller, allowing more battery placement flexibility. Tesla Model S drive unit and axles.  I only need the inner CVs from the axles as they are much too long for the narrower BMW Like Christmas, 14 Tesla Model S battery modules, packed in foam The Tesla batteries are temporarily stored in a wooden rack The packing foam is useful for testing fitment of the batteries This first step in getting the drive unit into the car is to re-enforce the rear of the car to support it and provide the necessary mounting points. Plenty of space to work with now Strengthen those wheel tubs as much as possible We ...

Rust never sleeps

Image
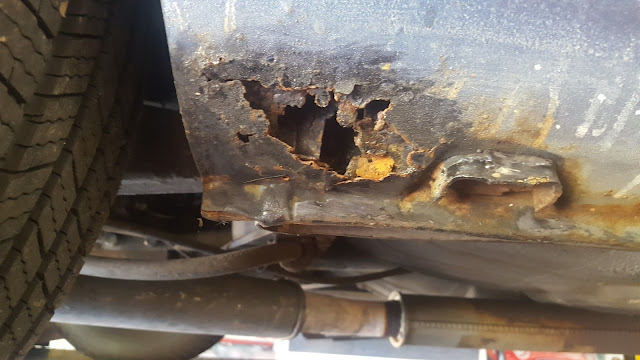
The truth is, most of the time spent in this "EV conversion" has been spent on body work having nothing to do with the EV project. I knew there was some rust in the right-side floor and in the rear corners of the rockers but we also found rust: Between the roof and the sunroof frame In the lower front fenders In the left rear floor panel In the pinch weld of the rockers In the front and rear window frames To be safe, we removed the entire sunroof structure, fabricated a new portion of the roof, welded it in, and then replaced the sunroof.  Getting the roof curve correct and straight has been very time consuming. To be safe, we removed the entire outer rocker so that we could see the condition inside.  It was fine but at least know we know that for sure.   To be safe, we replaced the lower section of the quarters and fenders on both sides. We replaced both rear floor sections and patched the front. At least now we ...

So you want to build an EV...

Image
It all sounds so easy.  Just throw out that old gas engine, bolt up an electric motor, add a few batteries and you're off to the races.  Or at least to the corner ice cream store in your new electric classic car.  If it only it were so.

No going back now

Image
The Tesla parts should arrive in a couple weeks. In the meantime, we've cut out the trunk area in anticipation of the motor install (I'm using the smaller Tesla rear-drive unit, by the way) so there's no going back now. The goal is 294 HP and 200 miles of range. There are still many, many details (battery placement, P/S, P/B, A/C, cooling, etc., etc.) to figure out.

Change of Plans

Image
The coupe was begging for updates.  Disassembly began in November, 2018 with the intention of upgrading the driveline to a modern early 1990s vintage BMW fuel injected 3.5 liter M30B35 and 5 speed manual transmission. After acquiring a new motor and trans, I ran across a guy named Paul Dexter who was converting his 3.0 CS to electric using a Tesla motor and batteries.  This was inspiring. 

Scope Creep

Image
I bought a "nice from 15 feet" 73 Baikal Blue USA Automatic coupe off eBay back in 2015. My wife and I drove it home from NorCal but the secondaries were stuck closed in the Webers and the trans wouldn't kick down. I spent a few years fixing little things and driving it. It was fine but there was some rust (spare tire, right rear floor, rocker rear corners) and it smoked a bit on deceleration so I decided to embark on a motor upgrade and undercarriage cleanup, without messing with paintwork yet. I'd save that for a full resto at a later date.