When we showed Paul's car off at the La Jolla Independent BMW owners gathering
in June, 2021 I realized that no one knew what they were looking at.
Electric conversions are still relatively rare and when we popped the hood to
show the big aluminum "oven" that holds most of the Tesla batteries people
asked questions like "is there a motor in there"?
|
|
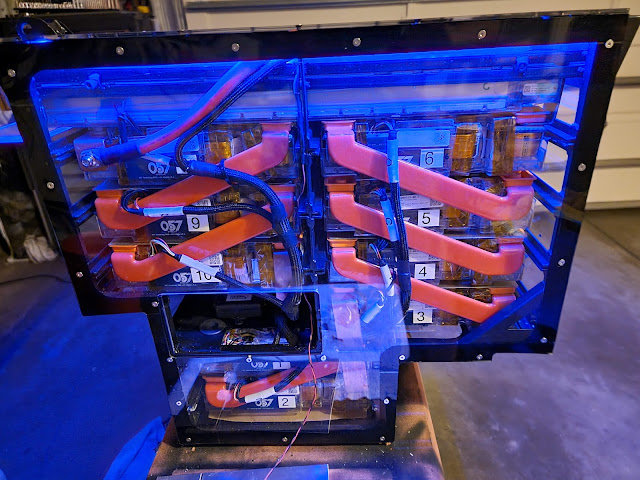
The front battery box with clear panels, wiring, and LED lighting
|

|
|
Working on a clear plastic skin for the battery box "fish tank"
|

|
|
The "oven" in Paul's car
|
This got me thinking. It sure would be nice if people could actually
see those batteries. Very few people know what a Tesla battery looks
like and they're impressive with all their thousands of little laptop
cells. I made my battery box out of steel (because it was cheap and
easy and I figured it only needs to last until battery technology improves
enough that I switch to some not-yet-invented higher density cells) so,
while it needs to be weatherproof, the skin is not structural. I had
started on an aluminum skin but after the show-and-tell I decided to switch
to a clear acrylic version instead. A see-through box, showing all the
guts in their high-voltage glory should be super cool.
I dub thee "The Aquarium."

|
|
The first idea was to use aluminum
|

|
|
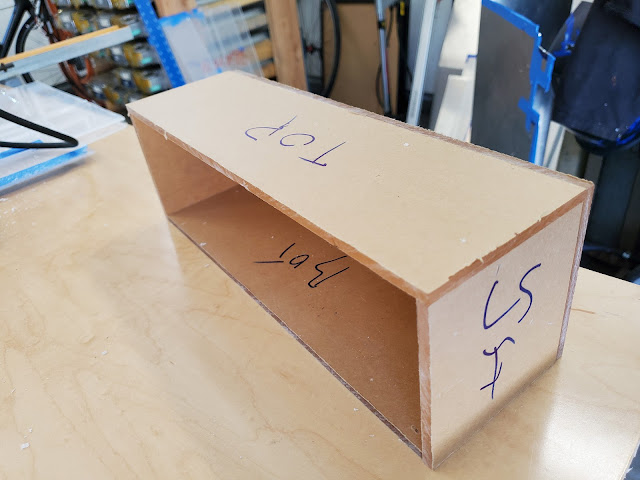
CAD (Cardboard-Aided-Design) was used to plan the cuts
|
I don't have much experience working with acrylic so I had a lot to
learn. Fortunately, I had recently cut some sheets for one of the art
installations at my daughter's gallery so I knew the stuff cuts well on my
table saw. But my box is far from square and requires a lot of tricky
cuts so I had to figure out how to do that.

|
If I had gone the aluminum route, it would've look something like
this
|
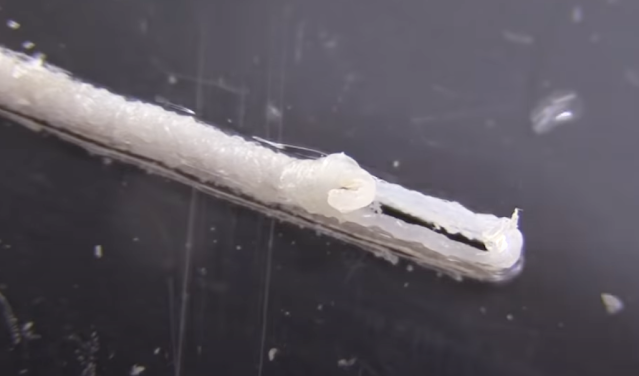
Normally, when you cut plastic with a jig saw you get a cut where the
plastic fuses together again behind this blade. The secret to avoiding
this is to use a small toothed metal blade, turn off oscillation on the saw,
set the saw to its slowest speed, and go slowly so that you don't build up
excessive heat. You can also spray the blade with water to cool it but
I found that unnecessary.
|
|
The cut melts together if you go too fast
|
I wanted the edges of my box to align perfectly. That's hard to do
with measuring and cutting. An alternative method is to do what wood
workers do with laminates and veneers: use a trim router with a follower
bearing bit. I wasn't sure how this would work on plastic but it turns
out to be great.
I also wanted the edges to be polished. This can be done in two ways,
or a combination of both. First, sand the cut marks off the edges,
then polish with a buffing wheel and compound and/or melt the edges with a
MAP-gas torch. This sounds crazy but it works well.

|
|
It looks nuts but it works
|
|
|
Top battery extension box prior to weld-up and edge polishing
|

|
|
Top battery extension box test fit
|
I needed to attach the plastic to the box so I needed fasteners. I
decided on small M4 stainless steel flat-head screwed threaded into
stainless steel rivet-nuts. This required drilling over 100 holes into
the rails of the box, mushrooming the rivnuts into the holes (I broke one
mandrel in the process), accurately marking where the rivnuts meet the
acrylic, drilling and countersinking holes in the plastic, and attaching.
I made locating "dowel pins" out of sharpened m4 bolts and threaded them
into the rivnuts to mark on the plastic where the holes needed to be
drilled. Drilling plastic can be a challenge with normal twist
drill bits -- the flutes of the bit grab and shatter the plastic. To
address this, you can either grind the flutes away to a sharp point or buy
bits specifically designed for plastic. I chose the
latter.
Countersinking also turned out to require a special tool. A normal
fluted countersink bit leaves a rough hole in the plastic. You need a
zero-flute bit to get clean holes. I also needed to make sure I got
the depth of each hole exactly right so that the bolts ends up flush with
the surface so I used the drill press to set a reliable stop. Then I
used the MAP-gas torch (quickly) on each hole to polish the cut. Be
quick though. If you hold it too long it melts and enlarges the
hole. Repeat 130 times.

|
|
Zero Flute countersink bits provide a clean finish.
|

|
|
Normal countersinks have only 2 flutes and really tear up the
plastic. Compare to lower left with zero-flute bit.
|

|
|
Hitting the hole with the torch (right) polishes up the finish
|
Some parts of the box require affixing two pieces together. For this,
I used Weld-On 3 acrylic plastic cement. It's strange stuff. As
thin as water and just as clear, you apply it with a hypodermic-style needle
to the joint and it is drawn in via capillary action. The glue
actually melts the plastic, "welding" the two pieces together.
It took a long time to fit all the pieces together. I added a thin
adhesive weatherstrip to the box edges and backed the acrylic with black
vinyl to provide clean lines.
|
|
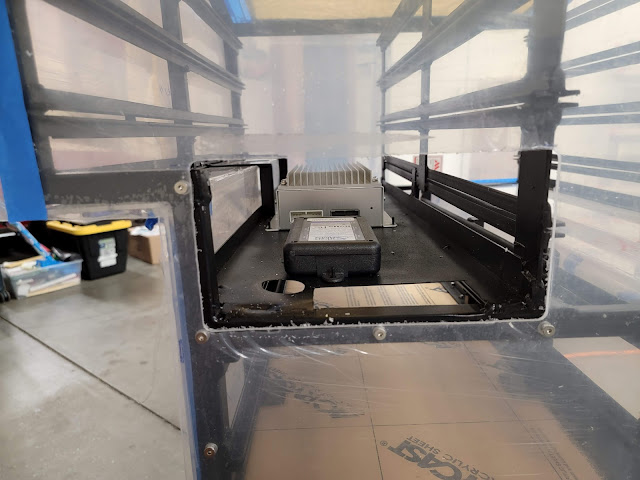
This is access hole in the back panel for connecting the BMS, thermistor
expansion module, and high voltage traction wiring. Of course, it
gets a waterproof cover.
|

|
|
The top battery is longer than the box is wide so it requires a special
extension box to weatherproof it
|

|
The extension box successfully welded onto the side panel, with just
enough room for coolant hoses
|

|
|
Time to drop it into the car for a test fit
|

|
|
Super tight fit. The iBooster literally touches the side of the
box.
|

|
|
It fits well underneath, sitting on the frame rails, original motor
mount brackets, and front subframe. The lower two batteries sit
where the oil pan would normally be.
|

|
|
Trimming the top to match the angle required cutting a wooden wedge to
make the trim router stand straight
|

|
I 3D printed a small tab (real one is black inside the clevis, orange
one was the prototype) to hold the panel tight
|

|
|
It's hard to see but there is a small black clip inside the clevis which
pulls the side panel in tight above the extension box
|

|
|
I went crazy with my wife's plotter/cutter to cut vinyl logos and masks
for the box. All were applied from the under side to protect them.
|

|
|
All edges were masked like a modern windshield to hide the weatherstrip
and provide a clean finish
|


